I am really excited for this tutorial. It is the kind of block that when you look at it you think: whoa. That is too tricky for me. And then you break it down and realize you CAN do it! And it is fun! I sound like a motivational speaker…
But seriously – give this one a try. You will want to show it off to everyone.
X Block Tutorial
For one 3 1/2″ block, you will need:
Rotary cutter and mat
Spray starch and Iron
1 1/2″ x 12″ strip of fabric
4″ square of fabric
Note: the pictures to go along with this tutorial show me making 10 blocks, because that is what we are doing for Saturday Sampler this month. Obviously if you are only making one block, or fewer blocks, you won’t need this much fabric.
1. Spray all your pieces with starch and press.


2. Trim your 1 1/2″ strip to 1 1/4″ wide.
3. Cut (1) 1 1/4″ square off the end of your strip of fabric. Set the square aside.
4. From the remainder of your 1 1/4″ strip cut (4) 2 1/2″ rectangles. Set aside.
5. Trim your 4″ square down to measure 3 3/4″. Cut each square twice diagonally to form four triangles.


6. If you are doing more than one block, group your triangles, squares, and rectangles as you want. Make sure the center square contrasts with the rectangles.

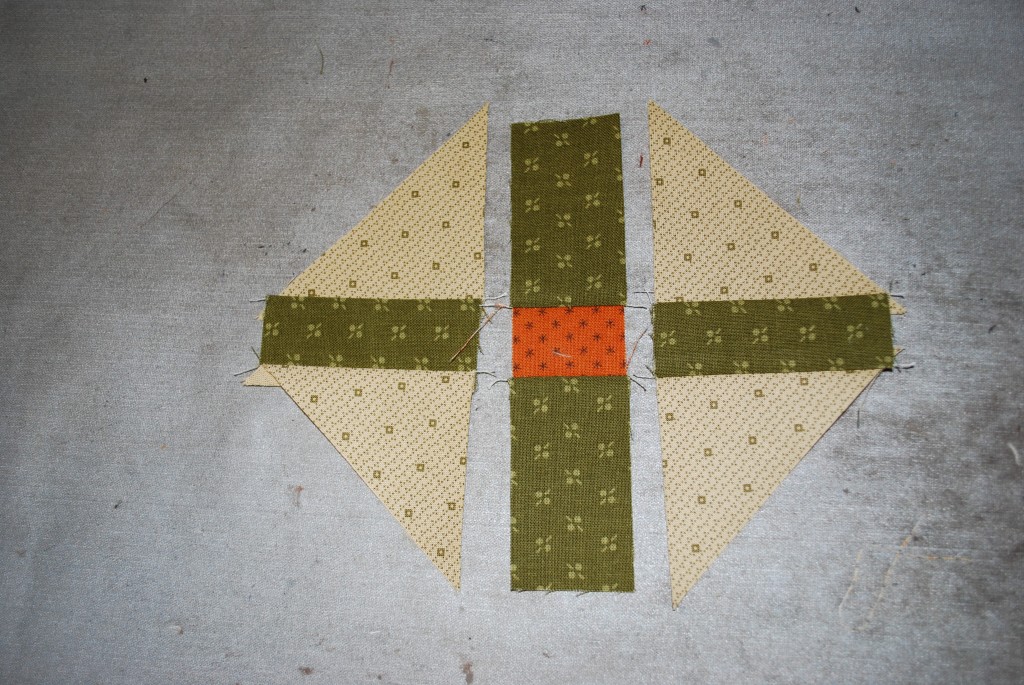
7. Sew two triangles onto the long edges of one rectangle, as shown. Repeat. Sew two for each block. Press seams toward the rectangle strip.
8. Sew the tiny square in between the remaining two rectangles. You will need one of these for each block. Press seams toward the rectangles.
9. Sew your piece from step 8 in between the two triangle units from step 7. Press your seams toward the center unit.


10. Trim each block to measure 3 1/2″. MAKE SURE that the little square is exactly in the middle of each block. Trim carefully!

And there you go! A beautiful X block.  Don’t forget – the giveaway ends TONIGHT!! So get yourself entered.


